
Wechat/Whatsapp: +86 135 6409 8916
Email: sales@oswellshunt.com
Wechat/Whatsapp: +86 135 6409 8916
Email: sales@oswellshunt.com
Fault Diagnosis and Troubleshooting of SMD Shunts: Sharing Common SMD Shunt Failure Symptoms and Methods for Troubleshooting Issues like Short Circuits, Open Circuits, and Drift
Introduction:
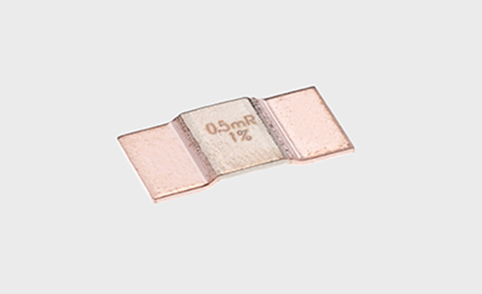
SMD Shunts are essential components used for current measurement in electronic circuits. However, like any electronic component, they can experience failures. This article aims to discuss common SMD Shunt failure symptoms and provide troubleshooting methods for issues such as short circuits, open circuits, and drift.
Common Failure Symptoms:
1. Short Circuit: A short circuit in an SMD Shunt occurs when there is a low-resistance path between the shunt terminals. This results in a significant increase in current flow, potentially damaging the shunt and causing inaccurate measurements. Symptoms of a short circuit include excessive heat generation and a drop in voltage across the shunt.
2. Open Circuit: An open circuit in an SMD Shunt happens when there is a break in the shunt's conductive path. This leads to a complete interruption of current flow, resulting in zero or significantly reduced current readings. Signs of an open circuit include zero current measurements and an increase in voltage across the shunt.
3. Drift: Drift refers to the gradual change in the resistance value of the SMD Shunt over time. This can result in inconsistent and inaccurate current measurements. Drift can be caused by factors such as temperature variations, mechanical stress, or material degradation. Symptoms of drift include inconsistent current readings that do not match the actual current flowing through the circuit.
Troubleshooting Methods:
1. Short Circuit:
a. Visual Inspection: Inspect the shunt visually for any signs of physical damage, such as burnt marks or melted solder joints. If visible damage is found, replace the shunt.
b. Continuity Testing: Use a multimeter in continuity mode to check for any low-resistance paths between the shunt terminals. If continuity is detected, there may be a short circuit. Replace the shunt if a short circuit is confirmed.
2. Open Circuit:
a. Visual Inspection: Examine the shunt for any breaks or loose connections. Ensure that the shunt is properly soldered to the circuit board.
b. Continuity Testing: Use a multimeter in continuity mode to check for continuity between the shunt terminals. If no continuity is detected, there may be an open circuit. Replace the shunt if an open circuit is confirmed.
3. Drift:
a. Temperature Compensation: Implement temperature compensation methods, as discussed in the previous article, to account for temperature-related resistance changes. This can help minimize drift-related measurement inaccuracies.
b. Component Replacement: If drift persists, consider replacing the SMD Shunt with a component that has a lower temperature coefficient and better stability over time.
Conclusion:
SMD Shunts can experience various failures, including short circuits, open circuits, and drift. Identifying the symptoms associated with each failure and implementing the appropriate troubleshooting methods is crucial to ensure accurate current measurements in electronic circuits. Visual inspection, continuity testing, temperature compensation, and component replacement are some of the methods that can be used to diagnose and troubleshoot SMD Shunt failures. By following these techniques, engineers can effectively identify and resolve issues, ensuring reliable current measurement in electronic circuits.

Fixed resistors, as the name suggests, are electronic components that have a fix...
2023-06-23 view+
When it comes to current measurement in electrical systems, engineers have a cho...
2023-10-31 view+
The patch element has the advantages of small size, light weight, high installat...
2023-03-27 view+
Hi, as an intern in a university laboratory, I have learned about metal film res...
2023-06-07 view+

Tel:+86 21 68756810/90 Fax:+86-21-68671885-16
E-mail:sales@oswellshunt.com
Address: RM. 701-703,738 DONG FANG ROAD,SHANGHAI 200122,CHINA